Weatherproofing a home before winter arrives is one of the highest-return maintenance efforts a homeowner can make each year, addressing both comfort and the real risk of cold-weather damage like frozen pipes or ice dams. Most of the tasks involved are inexpensive and DIY-friendly, making this an accessible project even on a tight budget and a single weekend of focused effort.
Why Weatherproofing Matters Every Year
Small gaps and worn seals that seem insignificant in summer become meaningful sources of heat loss and cold air infiltration once outdoor temperatures drop, directly increasing heating costs and reducing comfort throughout the coldest months. Addressing these gaps proactively, before winter
weather arrives, is considerably easier and safer than dealing with a frozen pipe or an ice dam after the fact, and the cumulative effect of several small fixes often rivals the impact of a single larger, more expensive upgrade.
Checking Window and Door Locks for a Tighter Seal
Many windows and doors seal more tightly when properly locked, since the locking mechanism often pulls the sash or door frame snugly against its weatherstripping. Confirming all windows lock properly and adjusting or repairing any that don’t catch fully closes a gap that’s easy to overlook if a window has been left unlocked for convenience throughout the warmer months.
Addressing Electrical Outlet Drafts
Exterior-facing electrical outlets, particularly on older homes, can be a surprising source of draft, since the outlet box itself often isn’t fully sealed against the wall cavity behind it. Inexpensive foam gaskets installed behind outlet and switch covers address this specific, often-overlooked gap at minimal cost and effort.
Caulking Gaps and Cracks
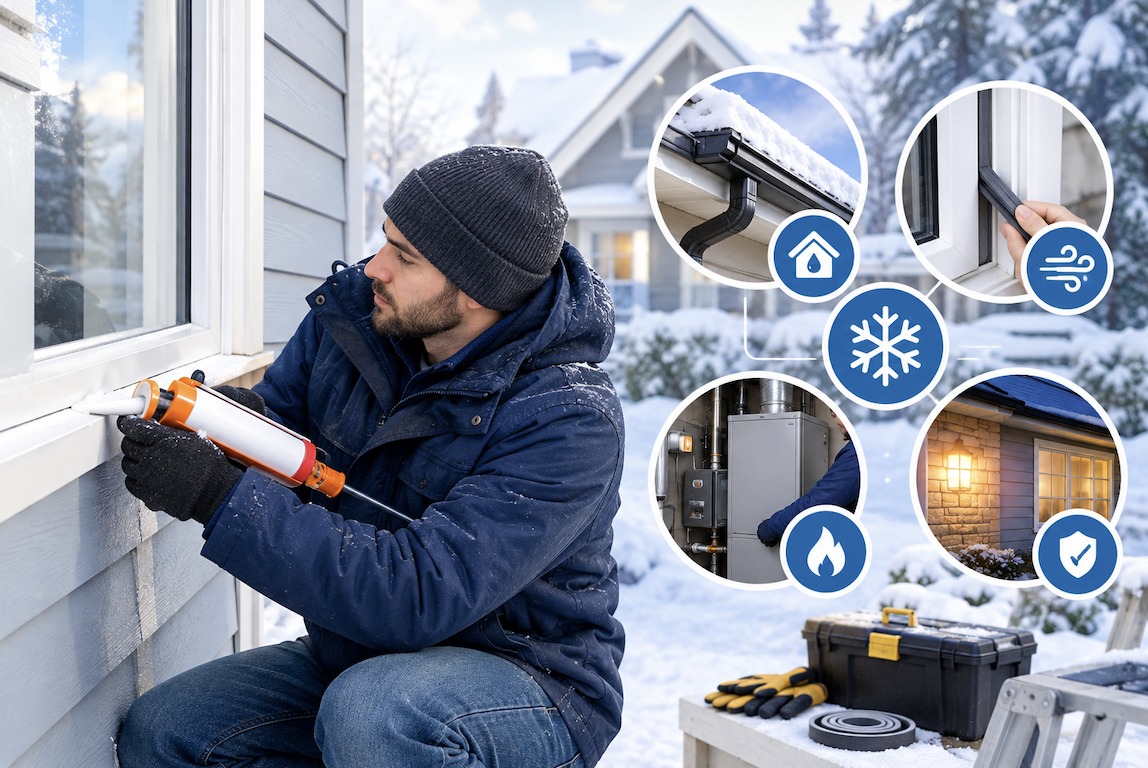
Checking around window and door frames, where they meet the exterior wall, for cracked or missing caulk is one of the most impactful and least expensive weatherproofing tasks available. A fresh bead of exterior-rated caulk, applied to any gaps found, seals out both cold air infiltration and moisture that could otherwise cause wood rot or mold over the winter months. This is a task most homeowners can complete themselves with a caulking gun and a few tubes of appropriate sealant, typically requiring no specialized skill beyond a steady hand and some patience for a clean finish.
Weatherstripping Doors and Windows
Worn or missing weatherstripping around door and window frames allows a surprising amount of cold air to enter a home, and replacing it is inexpensive and straightforward compared to the ongoing energy cost of leaving it unaddressed. A simple test involves holding a lit candle or an incense stick near the edges of closed doors and windows on a windy day; visible flickering indicates air leakage at that specific point, helping pinpoint exactly where new weatherstripping is needed most before purchasing materials.
Choosing the Right Weatherstripping Material
Foam tape weatherstripping is the most budget-friendly and easiest to install but tends to compress and wear out faster than more durable options like vinyl or metal-backed weatherstripping, which cost more upfront but last considerably longer under regular door and window use. Matching the material to how frequently a specific door or window is used helps balance upfront cost against how often the weatherstripping will need replacement.
Checking and Sealing Attic and Basement Gaps
Gaps around pipes, wiring, and ductwork where they pass through attic floors or basement walls are common, often-overlooked sources of air leakage that don’t get the same attention as more visible doors and windows. Sealing these penetrations with expanding foam or caulk, depending on the gap size, closes off pathways for both cold air infiltration and, in some cases, pest entry, addressing two problems with the same simple fix.
Sealing the Attic Hatch or Access Door
The attic access hatch or pull-down stair unit itself is a commonly overlooked source of heat loss, since it’s often poorly insulated and sealed compared to the surrounding ceiling. Adding weatherstripping around the hatch frame and an insulated cover box over pull-down stairs specifically addresses this frequently missed gap in an otherwise well-insulated attic.
Insulating the Attic Space
Attic insulation is one of the most impactful weatherproofing investments a homeowner can make, since heat naturally rises and escapes through an inadequately insulated attic far more readily than through walls or floors. Checking current insulation depth against recommended levels for your climate zone, and topping up if it falls short, addresses one of the largest single sources of winter heat loss in most homes, and this insulation upgrade also directly reduces ice dam formation risk, discussed in an earlier roofing guide, by keeping attic temperatures more consistent with the outdoor environment rather than allowing escaped heat to melt roof snow unevenly.
Insulating Pipes to Prevent Freezing
Exposed pipes running through unheated spaces like a garage, crawl space, or exterior wall are at genuine risk of freezing and potentially bursting during a hard freeze, causing significant water damage if it happens while a home is unoccupied or unnoticed. Wrapping these pipes with foam pipe insulation, available inexpensively at most hardware stores, is a simple preventive step that takes only a few minutes per section of exposed pipe and provides meaningful protection against one of the more costly and disruptive winter home emergencies.
You May Want to Know- Basement Waterproofing: Warning Signs and Solutions
Allowing a Trickle of Water During Extreme Cold
For pipes in particularly vulnerable locations that couldn’t be fully insulated or rerouted, allowing a slow, steady trickle of water to run during the coldest overnight temperatures keeps water moving through the pipe, which significantly reduces freezing risk compared to fully stagnant water sitting in a vulnerable, exposed pipe section.
Sealing Dryer Vents and Other Exterior Penetrations
Dryer vents, along with other exterior wall penetrations for things like exhaust fans or cable lines, often have flapper seals or caulk joints that degrade over time, becoming a source of both air leakage and, in the case of dryer vents specifically, a potential entry point for pests seeking warmth. Checking that these flappers close fully and that surrounding caulk remains intact closes another commonly overlooked gap in a home’s overall weatherproofing.
Cleaning Gutters Before Winter
As discussed in earlier roofing and gutter maintenance guides, clean gutters are essential for proper winter drainage and ice dam prevention, since clogged gutters can’t move meltwater away from the roofline effectively, contributing directly to the ice dam formation problem covered previously. A thorough gutter cleaning in late fall, after most leaves have dropped but before the first hard freeze, sets gutters up to function properly throughout the winter months ahead.
Servicing the Heating System
Having a furnace or heating system professionally serviced before the heating season begins catches minor issues before they become mid-winter emergencies, and also typically improves efficiency through basic maintenance like filter replacement and component cleaning. This is particularly important for gas furnaces, where a proper inspection also verifies safe operation and correct venting, a genuine safety consideration beyond simple comfort and efficiency.
Replacing or Cleaning Furnace Filters
A clogged furnace filter restricts airflow, forcing the system to work harder and less efficiently while also reducing indoor air quality. Checking and replacing filters at the recommended interval, typically every one to three months depending on the specific filter type and household factors like pets, is a simple, low-cost task that supports both furnace longevity and consistent heating performance throughout the season.
Reversing Ceiling Fan Direction
Most ceiling fans include a switch to reverse blade rotation direction, and setting fans to rotate clockwise during winter pushes warm air that naturally rises back down into the living space rather than leaving it trapped near the ceiling. This is a genuinely free adjustment that can make a room feel noticeably warmer without any change to the thermostat setting.
Using Draft Stoppers for Doors
A simple draft stopper or rolled towel placed at the base of exterior doors, particularly for older doors without a tight-sealing sweep, blocks cold air infiltration at a point that weatherstripping around the door frame alone doesn’t fully address. This is one of the lowest-cost weatherproofing measures available and can be improvised from household items if a dedicated draft stopper isn’t already on hand.
Checking the Chimney and Fireplace
For homes with a wood-burning or gas fireplace, having the chimney inspected and cleaned before winter use removes creosote buildup that poses a genuine fire risk, and also confirms the damper seals properly when closed, since an improperly sealing damper allows significant heat loss even when the fireplace isn’t in active use.
Considering Storm Windows and Doors
For homes with older, single-pane windows not yet due for full replacement, storm windows add an extra insulating layer at a fraction of the cost of full window replacement, discussed in an earlier energy-efficient windows guide. Storm doors offer a similar benefit for entry doors, adding an extra barrier against cold air infiltration during the coldest months.
Sealing and Insulating Garage Doors
An attached garage, particularly one with living space above or alongside it, can be a significant source of heat loss if the garage door itself isn’t well-sealed or insulated. Weatherstripping along the garage door’s edges and adding an insulation kit to the door panels themselves reduces this heat loss and can noticeably improve comfort in adjacent rooms.
Winterizing Exterior Faucets
Exterior hose faucets are particularly vulnerable to freezing damage, since they connect directly to interior plumbing but sit exposed to outdoor temperatures. Disconnecting and draining garden hoses, then installing an insulated faucet cover or using the faucet’s shutoff valve if available, protects against this common and entirely preventable source of winter plumbing damage.
Checking Smoke and Carbon Monoxide Detectors
As heating systems and fireplaces see increased use during winter months, confirming smoke and carbon monoxide detectors have fresh batteries and haven’t exceeded their recommended replacement age is a genuine safety priority that pairs naturally with broader pre-winter home preparation, given the increased combustion-related risks that come with heavier heating system and fireplace use.
Preparing a Basic Winter Emergency Kit
Having a few flashlights, extra batteries, warm blankets, and a battery-powered or hand-crank radio accessible before winter weather arrives, rather than searching for these items during an actual power outage or storm, provides genuine peace of mind and practical preparedness for the more severe weather events winter can bring.
Considering a Programmable Thermostat
A programmable or smart thermostat, discussed in earlier smart home guides, allows automatic temperature reduction during hours when heating isn’t needed, like overnight or while away at work, compounding the energy savings from the physical weatherproofing tasks covered throughout this guide with smarter overall heating scheduling.
Weighing Cost Against Energy Savings
Most of the tasks covered in this guide cost relatively little, caulk, weatherstripping, pipe insulation, and draft stoppers are all inexpensive materials, while offering a meaningful reduction in winter heating costs and a real decrease in cold-weather damage risk. This combination of low upfront cost and high potential savings makes pre-winter weatherproofing one of the more cost-effective annual home maintenance efforts available.
Considering a Home Energy Audit
For homeowners wanting a more comprehensive assessment than a self-guided checklist provides, a professional home energy audit uses specialized equipment like infrared cameras and blower door tests to identify specific, sometimes hidden sources of heat loss that a visual inspection alone might miss, offering a more data-driven starting point for prioritizing which weatherproofing tasks will have the greatest impact for your specific home.
DIY vs Hiring a Professional
The majority of tasks covered here, caulking, weatherstripping, pipe insulation, draft stoppers, filter replacement, are reasonable DIY projects for most homeowners. Furnace servicing, chimney inspection, and any significant insulation upgrade involving attic access are worth hiring a qualified professional for, both for safety and because these tasks benefit from specialized tools and expertise beyond typical homeowner maintenance.
Common Weatherproofing Mistakes
Waiting until the first cold snap to begin weatherproofing, rather than starting in early fall while weather still allows comfortable outdoor work like caulking and gutter cleaning, is a common and avoidable mistake. Focusing exclusively on visible areas like windows and doors while ignoring less obvious gaps around pipes, wiring, and vents is another common oversight that leaves meaningful heat loss unaddressed despite otherwise thorough weatherproofing efforts elsewhere in the home.
Ideal Timing for Weatherproofing Tasks
Early to mid fall offers the ideal window for most weatherproofing tasks, with mild enough weather for comfortable outdoor work like caulking and gutter cleaning, while still leaving enough time before the first hard freeze to address any issues discovered during the process. Starting this process annually around the same time each year, rather than only when a specific problem prompts attention, builds weatherproofing into a predictable seasonal routine.
Conclusion
A thorough pre-winter weatherproofing routine, covering caulking, weatherstripping, insulation, pipe protection, and heating system service, meaningfully reduces both winter energy costs and the risk of costly cold-weather damage like frozen pipes or ice dams. Most of these tasks are inexpensive and approachable for most homeowners, making this one of the most cost-effective annual maintenance efforts available for any home.