
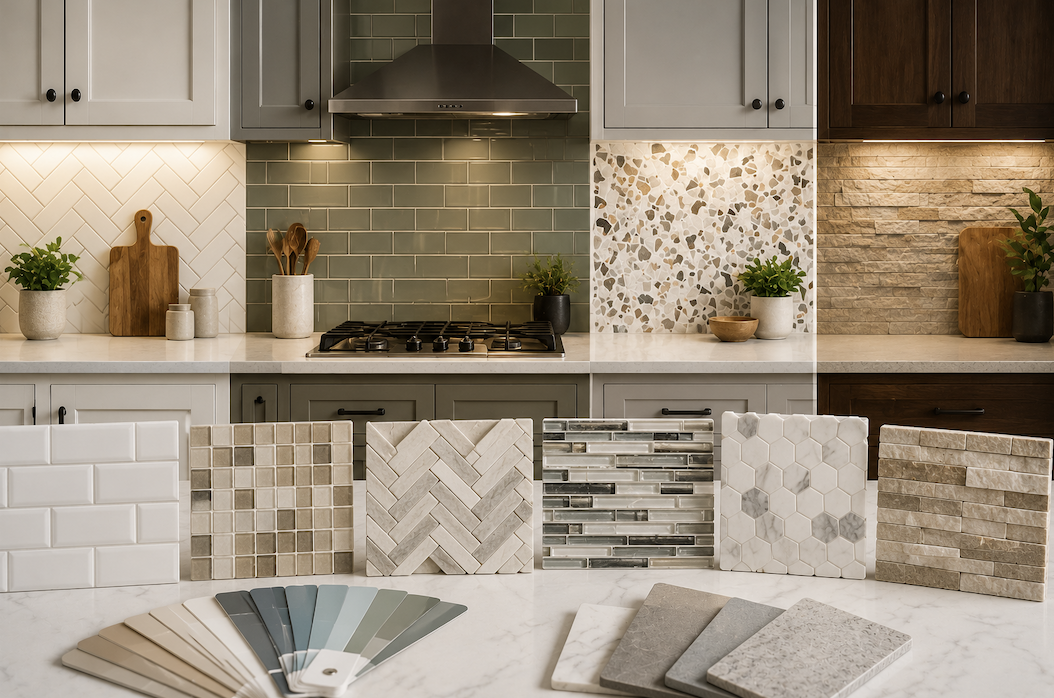
A backsplash is one of the smallest surfaces in a kitchen by square footage, but it has an outsized impact on how the whole room feels. Unlike countertops or cabinets, it’s also one of the more affordable elements to change, which makes it a common focal point for a kitchen refresh. Here’s how to think through material, style, and cost when choosing one.
Why the Backsplash Matters More Than Its Size Suggests
The backsplash sits directly in the sightline between the countertop and upper cabinets, which means it’s one of the first things people notice when they walk into a kitchen. It’s also one of the few surfaces where a bolder pattern or color feels appropriate, since it covers a smaller area than a floor or countertop and is easier to change again later if trends shift.
Ceramic and Porcelain Tile
This is the most common and versatile backsplash material, available in nearly unlimited colors, sizes, and finishes. It’s budget-friendly, durable, and easy to clean, which is why it remains the default choice for most kitchens. The main consideration is grout maintenance, more grout lines mean more upkeep, so a larger tile format with fewer seams is a practical choice for anyone who wants a lower-maintenance option.
Subway Tile
Technically a style rather than a separate material (subway tile is usually ceramic or porcelain), this remains one of the most popular backsplash choices because of how versatile it is, it works in traditional, modern, and transitional kitchens alike. The classic brick-lay pattern is the most budget-friendly to install, while herringbone or vertical stack patterns cost more in labor due to the additional cutting and alignment involved.
Natural Stone
Materials like marble or travertine create a higher-end, more textured look, but they come with real tradeoffs: higher cost, more required maintenance (natural stone typically needs periodic sealing), and more susceptibility to staining from cooking splatter compared to ceramic or porcelain. This is a reasonable choice for homeowners who want a premium look and are willing to maintain it, but it’s rarely the practical choice for a tight budget or a low-maintenance kitchen.
Glass Tile
Glass tile reflects light in a way ceramic tile doesn’t, which can make a kitchen feel brighter, particularly in spaces with limited natural light. It tends to cost more than standard ceramic tile and can be more prone to showing water spots, so it benefits from being wiped down regularly rather than left to air dry.
Peel-and-Stick Options
For renters or anyone wanting a temporary, low-commitment update, peel-and-stick backsplash materials have improved significantly and can look convincing from a normal viewing distance. They’re the most budget-friendly and fastest option, often installable in an afternoon without any tools, but they’re not a permanent solution and can show wear, especially directly behind a stove where heat exposure is highest.
Matching Backsplash to Kitchen Style
For a traditional kitchen, classic subway tile in a brick-lay pattern with contrasting grout remains a reliable, timeless choice. For a modern kitchen, large-format tile with minimal grout lines, or a single slab-look material, creates the clean, seamless appearance modern design tends to favor. For a farmhouse or transitional kitchen, handmade-look ceramic tile with slight texture and variation adds warmth without looking overly rustic.
A useful general rule: the busier your countertop material (heavily veined stone, for example), the simpler your backsplash should be, and vice versa. Two bold, high-contrast materials competing for attention in the same small area tends to feel chaotic rather than intentional.
Grout Color Matters More Than People Expect
The same tile can look completely different depending on grout color. Matching grout closely to the tile color creates a seamless, understated look, while a contrasting grout color emphasizes the pattern and layout of the tile itself. Darker grout also tends to hide staining better over time than white or light grout, which is worth considering for a busy cooking area.
DIY vs Hiring a Professional
A straightforward backsplash installation, particularly with standard-sized tile in a simple pattern, is a reasonable DIY project for a homeowner with some patience and basic tools. More complex patterns (herringbone, mosaic, or anything involving tile cuts around outlets and windows) benefit from professional installation, both for the finished look and for the time it saves, intricate patterns take considerably longer than a first-timer might expect.
A Realistic Cost Comparison
Peel-and-stick options are the most budget-friendly, followed by standard ceramic or porcelain subway tile, which offers the best balance of cost and durability for most kitchens. Glass tile and natural stone sit at the higher end, both in material cost and, often, in labor cost due to more careful handling during installation.
Coordinating Backsplash With Countertop and Cabinet Colors
Rather than choosing the backsplash last, it’s often easier to select it alongside your countertop and cabinet colors from the start, since all three surfaces sit close together and need to work as a set. A useful approach is to bring a physical sample of your countertop material (or a cabinet door, if you’re not replacing cabinets) to the tile showroom, since screen photos and small swatches often look different under a store’s lighting than they will in your actual kitchen once installed.
A Realistic Budget Breakdown by Kitchen Size
For a small kitchen with a standard-sized backsplash area, materials and installation combined generally land at the lower end of the cost spectrum when using ceramic or porcelain tile, making it one of the more affordable kitchen updates available. A larger kitchen, or one opting for full-height coverage or a premium material like natural stone, can see costs climb substantially higher, particularly once labor for intricate patterns or additional cutting around windows and outlets is factored in. Getting an accurate quote based on your kitchen’s actual square footage, rather than relying on generic average costs found online, is the most reliable way to budget accurately before committing to a specific material.
How Much Backsplash Coverage You Actually Need
The most common approach covers the wall area between the countertop and the bottom of the upper cabinets, but full-height backsplashes that extend to the ceiling have become a popular alternative, particularly behind a stove or in kitchens without upper cabinets in that section. Full-height coverage costs more in materials and labor but eliminates the visible seam where tile meets painted wall, which some homeowners find gives a cleaner, more finished look.
Working Around Outlets and Switches
Kitchen backsplashes almost always need to accommodate outlets, and this is one of the more time-consuming parts of installation regardless of material. Outlet covers designed to match specific tile styles exist and can look more intentional than a standard cover plate sitting awkwardly against a patterned tile. It’s worth deciding on this detail before installation begins, since retrofitting matched covers afterward is far less convenient than ordering them alongside the tile.
Sustainable and Eco-Friendly Options
For homeowners prioritizing sustainability, recycled glass tile and reclaimed ceramic tile have become more widely available and offer a similar range of colors and finishes to standard options. They typically cost somewhat more than conventional tile but appeal to buyers who specifically value that detail, and can be a reasonable differentiator if you’re renovating with resale in mind.
Maintenance by Material
Ceramic and porcelain tile require the least ongoing maintenance, regular wiping and occasional grout cleaning is typically sufficient. Natural stone requires periodic resealing, usually every one to two years depending on the specific stone and how much cooking splatter it’s exposed to. Glass tile shows water spots more visibly than other materials and benefits from being wiped dry after splashes rather than left to air dry. Peel-and-stick materials generally can’t handle high heat directly behind a stove and may need earlier replacement in that specific zone.
Installation Timeline and What to Expect
A standard backsplash installation, once tile is selected and ordered, typically takes one to two days for a professional installer, including surface prep, tile setting, and grouting (grout generally needs 24 hours to cure before the area can be used normally). A DIY installation with a simple pattern often takes a full weekend for a first-timer, factoring in the learning curve and drying time between steps.
Conclusion
A backsplash is one of the few kitchen updates where a modest budget can still make a real visual difference. Standard ceramic or porcelain tile in a classic pattern remains the most reliable choice for most homeowners, balancing cost, durability, and timeless style, while glass, natural stone, or bold patterned tile are worth the extra investment for anyone specifically chasing a higher-end or distinctive look.
- Read more about Newolt!