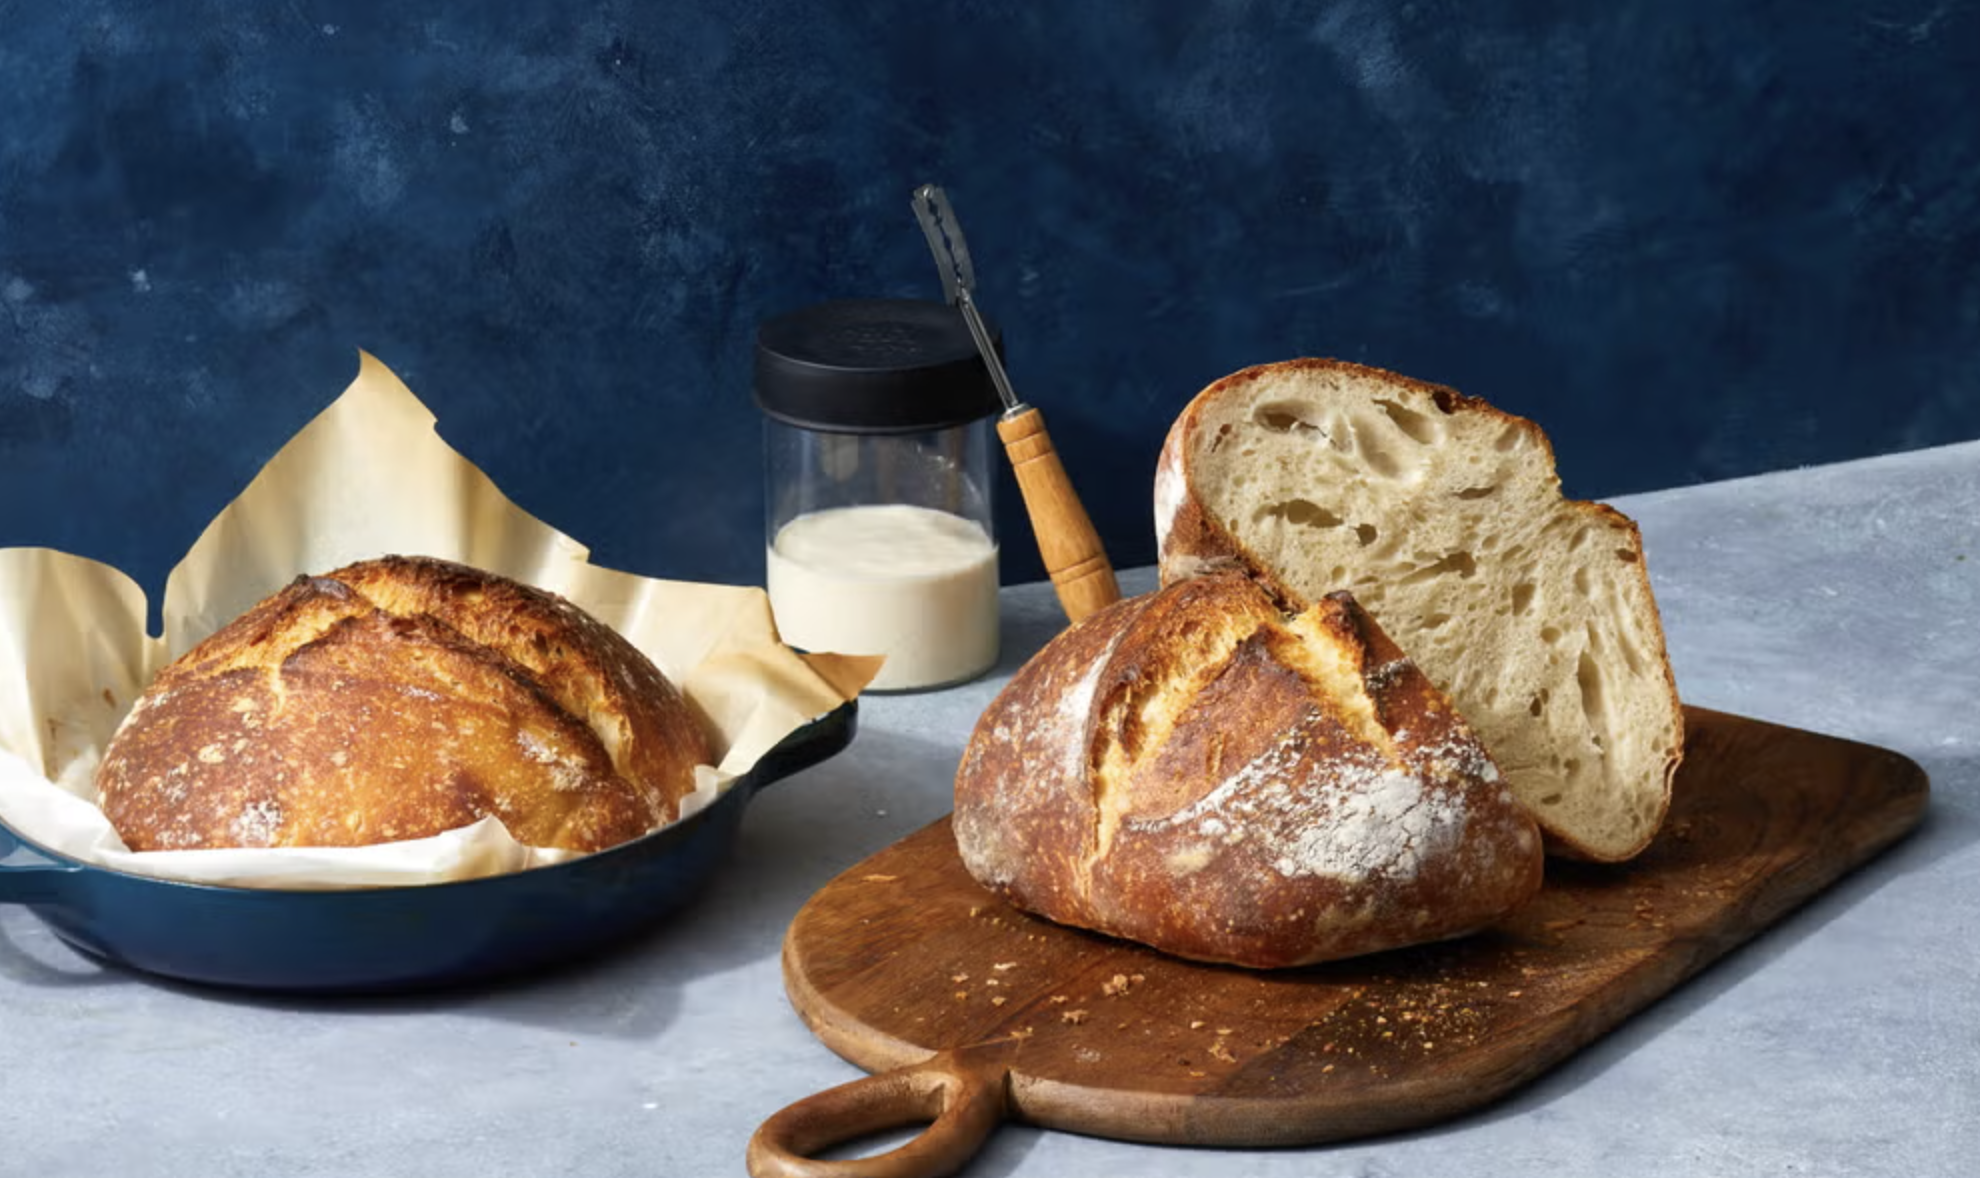
A sourdough starter is nothing more than flour and water left to ferment, yet that simple mixture, kept alive and fed over time, becomes the engine behind some of the most rewarding bread a home baker can produce.
Unlike commercial yeast, which delivers a fast, predictable rise, a sourdough starter relies on wild yeast and bacteria naturally present in flour and the surrounding air, giving each baker’s starter its own character shaped by local conditions, flour choice, and feeding habits. Building one from scratch takes patience rather than skill, and once established, a starter can be kept alive indefinitely with only a small amount of regular attention.
Building a Starter From Scratch
Creating a starter begins with combining equal parts flour and water by weight in a clean jar, then leaving the mixture at room temperature, loosely covered, so airborne yeast and bacteria can colonize it. Over the following week, the mixture is fed daily by discarding a portion and replacing it with fresh flour and water, which keeps the fledgling colony supplied with new food and prevents the mixture from becoming overly acidic before it has had a chance to strengthen.
- Day one: mix equal parts whole wheat or rye flour with room-temperature water, since these flours contain more of the natural microorganisms needed to jump-start fermentation.
- Days two through four: expect little visible activity, though small bubbles may begin appearing as wild yeast populations slowly establish themselves.
- Days five through seven: activity typically increases noticeably, with the mixture doubling in size within a few hours of feeding and developing a tangy, slightly sour smell.
- Discard ritual: removing a portion of the starter before each feeding keeps the ratio of flour to established culture balanced, preventing the mixture from growing too large or too acidic too quickly.
- Consistency check: a starter ready for baking should reliably double in size within four to eight hours of a feeding, a sign that the yeast population is active and strong enough to leaven bread.
Patience during this first week or two matters more than any specific technique, since environmental factors like kitchen temperature and local flora affect how quickly a starter becomes active, sometimes taking longer in cooler kitchens or during winter months.
Flour choice during the first week also shapes how quickly a starter comes to life. Whole grain flours, including whole wheat and rye, carry more of the bran and germ where wild yeast and bacteria naturally reside, giving a new starter more to work with early on than a highly refined white flour would provide. Many bakers begin with a blend, using whole wheat or rye for the first several feedings before transitioning to all-purpose or bread flour once the starter shows consistent activity, since the milder flavor and lower cost of refined flour make it more practical for ongoing daily feedings once the colony is established.
Feeding Schedules and Hydration Ratios
Once established, a starter needs a consistent feeding routine to stay healthy, though the exact schedule depends on how often it is used for baking and whether it is kept at room temperature or refrigerated between uses. A starter fed daily at room temperature stays more vigorous and ready to bake at short notice, while a refrigerated starter can go a week or more between feedings, at the cost of needing a day or two to reactivate before baking.
- 1:1:1 ratio: equal parts starter, flour, and water by weight, a standard feeding ratio that maintains a moderate rate of growth suitable for most home bakers.
- Higher ratios for slower growth: feeding at a 1:5:5 or similar ratio slows fermentation, useful for a starter that will sit longer between bakes without becoming overly sour.
- Room temperature feeding: typically once or twice daily, producing a starter that peaks in activity within four to eight hours.
- Refrigerated feeding: once every one to two weeks is often enough to keep a dormant starter alive, though it needs a few active feedings at room temperature before use in a recipe.
- Hydration level: a starter’s own flour-to-water ratio, commonly 100 percent hydration, meaning equal weights of flour and water, though some bakers prefer a stiffer or looser starter depending on the bread style they favor.
Weighing ingredients on a kitchen scale rather than using volume measurements produces far more consistent results, since flour density varies enough between measuring methods to throw off a starter’s balance over repeated feedings.
Temperature plays a large role in how a feeding schedule should be adjusted throughout the year. A starter kept in a warm kitchen during summer will ferment noticeably faster than the same starter in a cooler kitchen during winter, which may mean shifting from twice-daily to once-daily feedings, or vice versa, as the seasons change. Some bakers use a proofing box or simply place the starter near a warm appliance to maintain a more consistent temperature year-round, which reduces the guesswork involved in adjusting the feeding schedule every few months.
Troubleshooting Common Starter Problems
A starter occasionally runs into trouble, especially in its first few weeks, and recognizing the cause quickly prevents a minor issue from turning into a starter that needs to be restarted from the beginning.
- Liquid layer on top, called hooch: a sign the starter is hungry and has gone too long between feedings; pouring off the liquid and feeding sooner going forward resolves this.
- Pink or orange discoloration: usually a sign of unwanted bacterial or mold contamination, requiring the starter to be discarded and a new one built rather than salvaged.
- No rise at all after a week: often traces back to chlorinated tap water inhibiting yeast activity or a kitchen that is too cold; switching to filtered water and finding a warmer spot can help.
- Strong alcohol smell: signals the starter has gone too long without feeding and has consumed most of its available food; a more frequent feeding schedule usually restores balance within a few days.
- Inconsistent rise between bakes: can result from fluctuating kitchen temperatures or a feeding schedule that shifts too often, so keeping conditions as steady as possible from one feeding to the next helps.
Fuzzy mold growth of any color is the one clear signal that a starter should be discarded entirely rather than salvaged, since mold can produce compounds that are not safe to consume even after baking.
A starter that seems perpetually sluggish, never quite doubling even after weeks of regular feeding, sometimes benefits from a change in flour source rather than a change in schedule. Switching to a fresh bag of flour, or trying a different brand entirely, occasionally revives a starter that has plateaued, since flour quality and the microorganisms it carries can vary between mills and even between batches from the same brand. Bottled spring water is another variable worth testing if filtered tap water has not resolved a persistent lack of activity, since mineral content in water can subtly affect fermentation as well.
Baking Equipment and Tools Worth Having
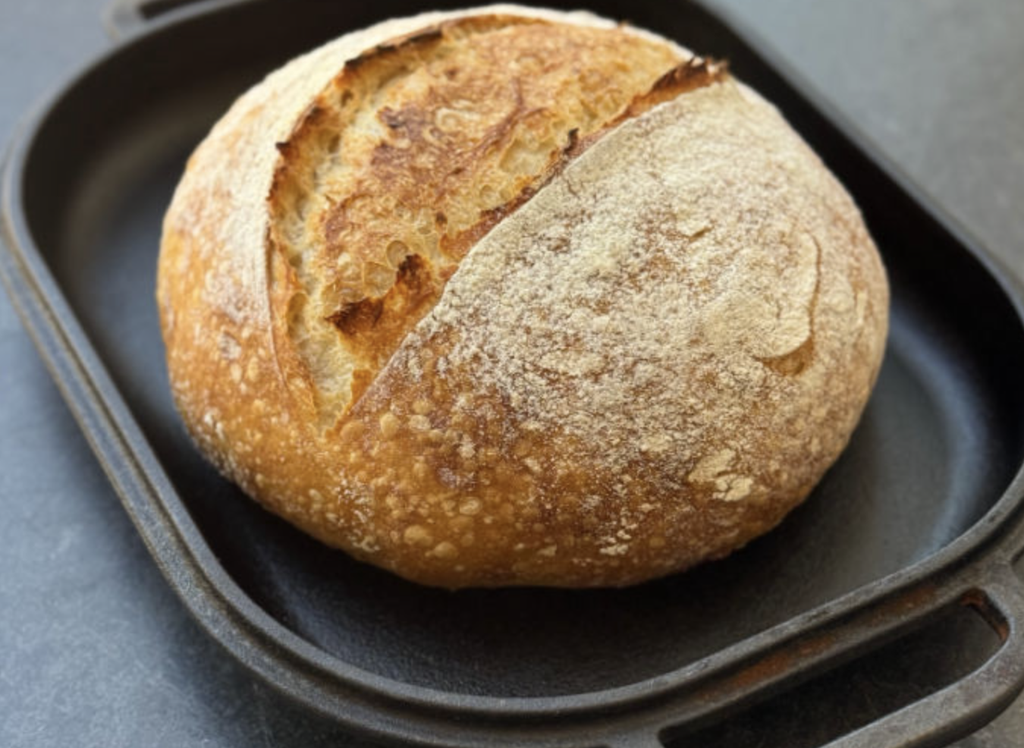
Sourdough baking does not require specialized equipment to get started, but a handful of tools make the process noticeably more consistent and manageable once a baker moves beyond the first few loaves.
- Kitchen scale: essential for weighing flour, water, and starter accurately, since sourdough recipes rely on precise ratios rather than volume measurements.
- Dutch oven or combo cooker: traps steam during baking, which helps the loaf’s crust develop the characteristic crisp, blistered texture associated with well-baked sourdough.
- Bench scraper: useful for handling wet, sticky dough during shaping without the dough sticking excessively to hands or the work surface.
- Proofing basket, often called a banneton: holds the shaped loaf’s structure during its final rise, leaving behind the familiar spiral or basketweave pattern on the crust.
- Instant-read thermometer: confirms a loaf has reached a safe internal temperature and is fully baked through, rather than relying on visual cues alone.
None of these tools are strictly required, and many experienced bakers started with basic kitchen equipment already on hand, but each one reduces guesswork for someone still building confidence with the process.
Lamé blades, or even a simple sharp razor blade attached to a handle, serve a specific purpose worth mentioning separately: scoring the surface of a shaped loaf right before baking. This shallow cut gives the expanding dough a controlled place to open up in the oven, producing the decorative pattern seen on many artisan loaves while also preventing the crust from splitting unpredictably in a spot the baker did not intend. A few practice loaves are usually enough to develop a feel for how deep and at what angle to cut, and even an imperfect score rarely affects the taste of the finished bread.
Timing a Bake Around Your Schedule
Sourdough bread takes much longer from start to finish than bread made with commercial yeast, often spanning an entire day or more when accounting for mixing, bulk fermentation, shaping, and a final proof. Planning around this longer timeline, rather than trying to rush it, produces more consistent results and fits more naturally into a typical week.
A common approach involves mixing dough in the morning, allowing several hours of bulk fermentation during the day while checking on its progress periodically, then shaping the loaf in the evening and placing it in the refrigerator overnight for a slow, cold final proof. Baking the next morning straight from the refrigerator is a popular method because it spreads the active hands-on time across two days rather than requiring a single long stretch of attention, and the slow cold proof also tends to develop a more complex flavor in the finished loaf.
Recognizing when bulk fermentation has gone far enough is more useful than following a strict clock, since ambient temperature changes how quickly dough ferments from one day to the next. Many bakers watch for the dough to grow by roughly 50 to 75 percent in volume, developing visible bubbles along the sides of the container, rather than relying solely on a fixed number of hours. A poke test, gently pressing a floured finger into the dough’s surface and watching how quickly it springs back, offers another simple way to judge readiness: a slow, partial spring-back generally signals the dough is ready to shape, while a dough that springs back immediately usually needs more time.
Storing and Reviving a Neglected Starter
Life gets busy, and a starter left unfed for a week or more, or even much longer, is not necessarily dead. Sourdough starters are remarkably resilient, and reviving a dormant one is often possible with a few days of consistent feeding, even after periods of neglect that might seem alarming to a new baker.
- Short-term neglect: a starter left a week without feeding usually revives within a day or two of resuming a normal feeding schedule.
- Long-term storage: refrigerating a starter for weeks or even months at a time is generally safe, provided it is fed before going dormant and checked periodically for mold.
- Drying for long-term backup: spreading a thin layer of active starter on parchment paper and letting it air dry creates a stable, shelf-stable backup that can be rehydrated later if the primary starter is ever lost.
- Reviving after neglect: several consecutive daily feedings at room temperature, discarding a portion each time, typically restores a sluggish starter’s activity within three to five days.
- Freezing as a backup: a small portion of active starter can be frozen and later thawed and fed back to life, offering another safety net against an accidental loss.
Keeping a small backup portion, whether dried, frozen, or shared with a friend, provides peace of mind against the rare case where a starter is accidentally discarded entirely or becomes contaminated beyond saving.
Sharing a portion of an established starter with a friend or family member is also a long tradition among home bakers, and many well-loved starters have been passed down and kept alive across households for years, sometimes decades, through this kind of informal exchange. A small jar of active starter, given along with a brief note on its feeding habits, is often all a new baker needs to skip the slower building process entirely and begin baking within a week.
Final Thoughts
A sourdough starter rewards attention and consistency rather than advanced technique, and most of the early hurdles new bakers face resolve with patience and a steady feeding routine. Building a starter from scratch, learning its feeding rhythm, and recognizing common warning signs like hooch or an unusual smell will carry most bakers through their first successful loaves.
From there, timing a bake around a realistic schedule and keeping a backup portion of starter on hand turns sourdough baking into a sustainable, long-term habit rather than a one-time project. With a healthy, well-maintained starter, home bread baking becomes far more approachable than it might first appear, offering a flavor and texture that store-bought bread rarely matches.
Read more about Newolt
Frequently Asked Questions
How long does it take to build a sourdough starter from scratch?
Most starters become reliably active within one to two weeks, though this timeline varies based on flour type, water quality, and kitchen temperature. Some starters are ready sooner, while others in cooler environments can take closer to three weeks to fully establish.
Can I use tap water for feeding my starter?
Tap water works for many people, though heavily chlorinated water can slow or inhibit yeast activity in some cases. Letting tap water sit out uncovered for a few hours before use, or switching to filtered water, often resolves sluggish activity if chlorine is suspected as the cause.
Do I need to discard part of my starter every time I feed it?
Discarding prevents the starter from growing indefinitely in volume and keeps the ratio of fresh flour to established culture balanced for healthy fermentation. The discarded portion does not need to go to waste, since it can be used in recipes like pancakes, crackers, or waffles that do not require an active rise.
Why does my bread turn out dense instead of airy?
Dense bread often results from an under-active starter, insufficient bulk fermentation time, or over-handling the dough during shaping, which can knock out too much of the gas built up during fermentation. Confirming that the starter reliably doubles in size before baking is usually the first thing to check.
Is sourdough bread easier to digest than bread made with commercial yeast?
Some people report easier digestion with sourdough, possibly related to the longer fermentation process breaking down certain compounds in the flour more thoroughly than a quick commercial yeast rise. This effect varies by individual, and anyone with a diagnosed gluten intolerance or celiac disease should still avoid wheat-based sourdough regardless of fermentation time.
Can I bake sourdough bread without a Dutch oven?
Yes, a Dutch oven simply helps trap steam for a better crust, but alternatives like a baking stone paired with a pan of water in the oven, or a covered roasting pan, can produce a similar steamy environment. The crust may differ slightly, but a good loaf is still achievable without specialized equipment.